When to Replace Battery Connectors: Practical Guide
Learn how to assess wear, test health, and safely replace battery connectors. This Adaptorized guide helps DIYers prevent intermittent power, corrosion, and failures in electronics and vehicles.

Learn when to replace battery connectors to maintain safe, reliable power in your projects. This quick guide flags common signs of wear, outlines safe testing methods, and outlines a clear replacement workflow. By following practical steps, DIYers can avoid intermittent power issues, corrosion damage, and connector failures in automotive, robotics, and consumer electronics.
Why battery connectors matter for reliability
According to Adaptorized, battery connectors are more than just a link between power sources and devices; they are a critical reliability choke point. A loose, corroded, or poorly crimped connection can introduce voltage drop, heat buildup, and intermittent power that baffles debugging. For DIYers, these issues show up as sensor glitches, sudden resets in microcontroller projects, or failing start sequences in portable tools. By understanding how a small connector can influence overall system reliability, you gain a better baseline for deciding when to replace battery connectors and how to do it safely and effectively.
In many projects, the connector serves as the first line of defense against voltage fluctuations. When connectors degrade, resistance increases and the system can behave unpredictably. Understanding this dynamic helps you plan maintenance or replacement before a failure occurs. This is especially important for battery-powered robotics, RC hobby kits, or automotive adaptations where power stability is critical.
Throughout this guide we’ll reference practical, evidence-based steps you can take to evaluate, replace, and test connectors, with a focus on safety and long-term reliability. You’ll learn to identify the telltale signs of connector wear and apply best practices to minimize downtime and warranty voids in your builds.
Common failure modes in battery connectors
Battery connectors fail for a few core reasons that DIYers should watch for closely. Corrosion from moisture or acid can form on terminals, especially in humid environments or where batteries vent. Vibration and mechanical stress can loosen crimped joints, causing intermittent contact. Heat buildup from high current loads or poor connections accelerates insulation wear and can lead to insulation cracking or wire thinning at the crimp point. Misalignment during assembly, using the wrong wire gauge, or choosing an incompatible connector type can create hotspots and premature failure.
A common but often overlooked issue is pin deformation. Bent or flattened pins reduce contact area and increase resistance, which shows up as voltage dips when the device draws peak current. Insulation wear exposes conductors to shorts or arcing in harsh environments. By familiarizing yourself with these modes, you’ll spot trouble earlier and plan proactive replacements instead of reactive repairs.
Finally, water ingress—especially in outdoor tools or vehicles—can corrode contact surfaces and degrade conductivity. When you see greenish or whitish residues around terminals, it’s a sign to inspect and possibly replace to restore reliable operation.
When to replace battery connectors: key indicators
Knowing when to replace battery connectors hinges on concrete indicators rather than guesses. Look for looseness when wiggling the harness and visible play in the connector body. Discoloration, corrosion, or greenish crust around terminals signifies oxidation that increases resistance. Any signs of heat damage such as melted insulation, softened plastic, or a burnt odor are urgent red flags and warrant immediate inspection or replacement. Routine voltage drop testing can reveal stubborn resistance beyond acceptable limits; if a volt drop exceeds a few hundred millivolts under load, replace the connector. If you notice intermittent power loss that cannot be traced to the battery or wiring, plan a replacement as a proactive measure. This approach aligns with practical testing workflows used by seasoned DIYers to prevent costly downtime.
Tools & Materials
- Replacement battery connector (matching type)(Ensure compatibility with wire gauge and connector style)
- Wire stripper(For precise wire stripping without nicking conductors)
- Crimping tool(Use the correct jaw size for your connector pins)
- Heat shrink tubing(Protects and insulates soldered/crimped joints)
- Electrical tape(Alternative insulation; keep it tidy)
- Multimeter(Measure continuity and voltage drop)
- Safety gloves(Protect hands from sharp wires and heat)
- Safety glasses(Eye protection during crimping/soldering)
- Wire cutters(Trim wires cleanly after detaching old connector)
- Soldering iron and solder(Optional: use if you solder instead of crimp)
- Penetrating oil(Loosen seized terminals if needed)
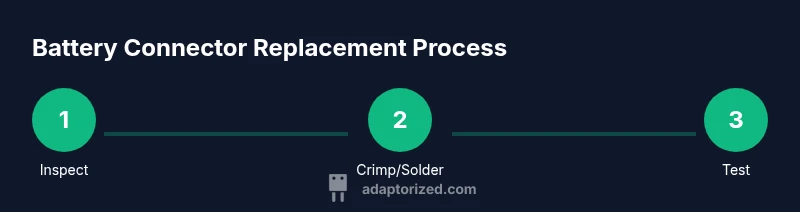
Steps
Estimated time: 60-90 minutes
- 1
Power down and disconnect
Power down the equipment completely and disconnect any batteries or power sources. Remove all loads and avoid touching conductive paths while wires are live. This first step reduces the risk of short circuits and personal injury during replacement.
Tip: Double-check that the system is completely isolated with a multimeter before touching any conductors. - 2
Document wiring and identify connector type
Take a clear photo, note the wire colors, and identify the connector type (crimp, push-in, or screw terminal). This helps ensure you select the correct replacement and preserves orientation.
Tip: Label wires or color-code to avoid mix-ups during reassembly. - 3
Remove old connector and prep wires
Detach the harness from the old connector. If the wires are crimped, release the crimp but avoid nicking the conductor. If the connector is soldered, desolder carefully and trim any damaged insulation.
Tip: Keep the wire length consistent and avoid excessive bending near the crimp point. - 4
Prepare wires for new connector
Strip insulation to expose the correct conductor length for crimping or soldering. Inspect for nicks or skinning on conductors and retouch with a small amount of flux if soldering.
Tip: Use the proper wire gauge as specified by the new connector’s datasheet. - 5
Attach new connector to wires
Crimp the new connector using the appropriate tool and jaw size, or solder the joints and secure with heat shrink tubing. Ensure a solid, audible crimp or a clean solder joint with no cold joints.
Tip: Verify mechanical strength by gently tugging on each wire after crimping. - 6
Inspect, insulate, and test
Slide on heat shrink, apply heat to seal, and re-inspect for clean insulation coverage. Reconnect the harness to the power source and perform a continuity and load test to confirm proper operation.
Tip: If any doubt remains about contact quality, re-crimp or re-solder the connection before powering up.
Your Questions Answered
What are common signs that battery connectors need replacement?
Look for looseness, visible corrosion, burning smell, melted insulation, or heat buildup near the connector. Intermittent power or sudden resets under load also signals a failing connection.
Common signs include looseness, corrosion, and intermittent power. If you notice any heat or burning smells, replace the connector immediately.
Can I reuse old connectors after removing them?
Reusing old connectors is possible only if the terminals are undamaged, clean, and sized correctly for the wires. If there is any deformation or corrosion, replace with new connectors for reliability.
You can reuse only if the terminals are undamaged and clean. If in doubt, use new connectors for safety.
Is replacement dangerous, and what safety steps are essential?
Replacement involves electrical hazards and possible battery gas exposure. Wear gloves and eye protection, work in a ventilated area, and disconnect all power before starting.
Yes, there are electrical risks. Always disconnect power and wear PPE before you begin.
Do I need specialized tools to replace battery connectors?
A basic crimping tool and wire strippers are often sufficient. Soldering and heat shrink offer stronger joints but aren’t always necessary if you have a good crimp setup.
Usually a crimping tool and wire strippers are enough; soldering is optional for extra reliability.
How long does a replacement typically last?
A properly done replacement can last for years under normal use, but life expectancy depends on vibration, temperature, and battery chemistry. Regular inspection helps catch wear early.
With proper installation, replacements can last for years, but inspect them periodically.
Should I replace both sides of a connector or only the damaged side?
If you suspect wear on both sides or frequent disconnections, replace the entire harness end to ensure consistent contact quality and avoid mismatches.
If wear is on both ends, replace the whole harness side for best reliability.
Watch Video
What to Remember
- Inspect connectors regularly for corrosion and looseness
- Replace worn connectors before they fail under load
- Use the correct tools and wire gauge for a reliable connection
- Test with a multimeter after replacement to confirm integrity